How To Schedule A Meeting In Outlook
Organizing a meeting is an important part of day-to-day business. Having this collaborative time is key to building networks, checking in with teams, communicating updates, solving problems, and ensuring processes are running smoothly.
Outlook allows you to create and schedule meetings with a fairly easy interface to navigate. To schedule a meeting in outlook, just follow the seven steps outlined below and you’ll have your meeting set up in no time.
Now, here’s how to schedule that meeting in Outlook
1. Check Your Calendar
If you are hosting a meeting, the first step is to check your calendar to see what time works best for you.
Click on the ‘calendar’ icon, and then look over your schedule to see when you have a sufficient gap. Choose a time that suits you, but also does not clash with any big meetings or events that you know many others will need to attend.
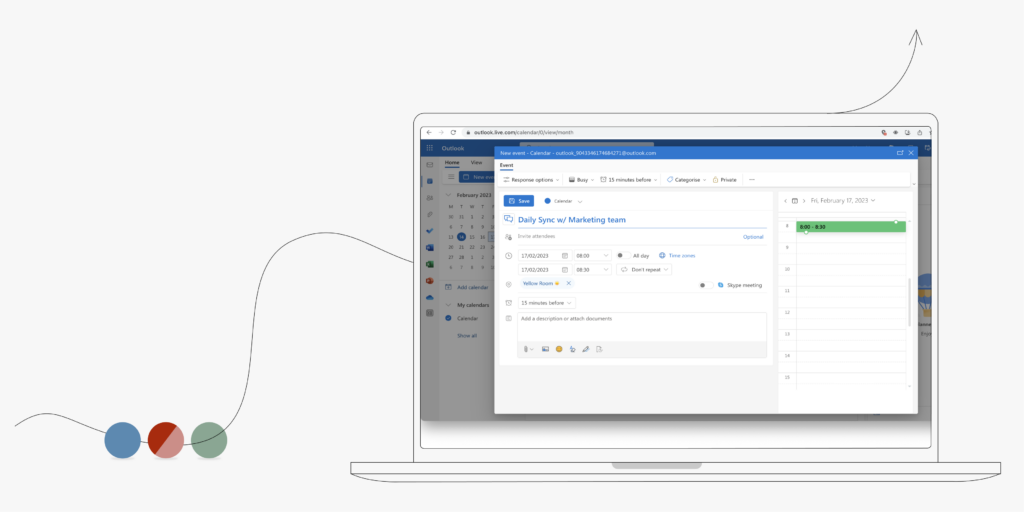
2. Schedule Meeting
Keep your calendar open in Outlook. Click on the ‘home button’ and then select ‘new meeting’.
You will then be able to provide a title/name for your meeting. Try to be clear with the title so that invitees are aware of what a meeting it is.
You can also select a date and time for the meeting. It is best to select an end time, too. This keeps the meeting concise and gives participants an idea of how long the meeting will be so that they can plan their day better.
3. Select Participants
Next, you need to add the meeting participants. You will do this by listing the email addresses of the people you want to invite.
You should have two fields in which you can type in email addresses: required and optional.
Use the ‘optional’ field if there are participants for whom the meeting is not compulsory. If this is not the case, you can just add all email addresses in the ‘required’ field.
4. Decide Location
The next step is to select a location for the outlook meeting.
Meeting rooms in the organization should be loaded on the system, so all you will need to do is click on the ‘Location’ button to select one.
With a room booking system like Joan, your meeting reservation will be displayed directly on the meeting room door for everyone to see.
Alternatively, if the meeting will be taking place online, you can add a Teams meeting link to the meeting description instead.
Add
5. Outline Agenda
If you would like to outline the agenda for the meeting so that participants can prepare themselves, you can do so in the meeting dialogue field.
This also provides more clarity on what the meeting is about so that optional recipients can make an informed decision about whether they will attend or not.
If you do not have the agenda ready when sending out the meeting invite, you can always email it to the relevant participants at a later stage.
6. Send Material
If there are supporting documents or resources that you want participants to peruse to prepare themselves before the meeting, you can attach them to the invite. To do this, click on ‘insert’, then ‘attach file’, and then you can add the files that you want to send out.
Again, this can be emailed out afterward if you do not have documents ready when sending the invite.
7. Send Meeting Invite
Finally, all that is left to do is send out the meeting invite. You can do this by pressing the ‘send’ button.
This will email the meeting invite to all participants added, and allow them to RSVP to the meeting based on whether they can attend or not.
You will be able to track these responses so that you know how many people can make it and how many people cannot.

Conclusion
Scheduling a meeting on Outlook is a quick, simple way to do it without the stress and time of having to communicate with several people at once. In just a few minutes, you can easily set up all the key details of a meeting and send it out to everyone in one go.
Outlook offers numerous settings that you can customize to make the scheduling process work for you. It also integrates seamlessly with Joan so that you can streamline your meeting room bookings.
Frequently Asked Questions
To schedule a meeting in Outlook 2024, follow these steps:
- Open Outlook and click on the “Calendar” icon in the navigation pane.
- In the “Home” tab, click on the “New Meeting” button in the “New” group.
- Enter the email addresses of the attendees in the “To” field.
- Add a subject for the meeting and any additional details in the body of the message.
- If desired, specify a location, start time, and end time for the meeting by using the “Location” and “Start Time” fields.
- Click on the “Send” button to schedule the meeting. Outlook is especially efficient when combined with Joan meeting room schedulers that are wirelessly placed on meeting room doors.
Scheduling a meeting invite in Outlook is a simple and effective way to organize meetings and communicate with team members. All meetings scheduled in Outlook are reflected on Joan meeting room booking devices that are wirelessly placed on meeting room doors.
Calendar Integration – Outlook’s calendar integrates seamlessly with meeting invitations, making it easy to schedule and keep track of meetings.
Scheduling Assistant – Outlook’s scheduling assistant allows users to view the availability of attendees, avoid scheduling conflicts, and propose alternate meeting times.
Customizable Invitations – Outlook allows users to customize meeting invitations with relevant details such as meeting location, agenda, and attachments.
Reminder Notifications – Outlook automatically sends reminders to attendees before scheduled meetings, reducing the risk of missed or forgotten appointments.
Meeting Tracking – Outlook allows users to track responses and attendance, making it easy to manage meetings and follow up with attendees.
Scheduling a meeting invite in Outlook can enhance workplace productivity by streamlining the scheduling process, reducing administrative time and costs, and improving communication between team members, especially when combined with Joan meeting room schedulers.