The Joan 6 device has been discontinued. Take a look at our online shop for our latest offers.
With the “Custom button” feature, you are able to replace one of the three buttons of the Real-time booking functionality (“Meet now”, “Meet later”, “Timetable”) with a custom button that can be one of the two following options:
This feature can be set also as a building or device-specific setting. Allowing you to further customize your office experience. To learn more about these levels of settings, see MyJoan settings - per device, per building, and global.
This feature will only work if your Joan device has its touch capabilities enabled. If you are unsure how to enable/disable it, see How to turn on/off the touch screen on Joan 6 devices.
You can set one of the buttons to display a custom QR code which will lead your guests to your company’s website or connect them to your office’s Wi-Fi network.
In order to set up the QR code custom button on your Joan device, you will have to follow these steps:
- Log in to MyJoan with your account credentials
- Navigate to the “Settings” page via the top navigation menu
- Select “Rooms” from the left-hand side menu and the "Device Settings"
- Scroll down and enable the “Custom button” feature
- Select “QR Code” as the “Action type”
- Select one of the three buttons you wish to replace in the “Replaces button” drop-down menu
- Enter the text you wish to be displayed as the button’s title in the “Button label” field. Keep in mind that the maximum number of characters allowed is 10
- Enter the message/URL you wish the QR code to contain in the “QR Code Message” field
- Click “Save” at the bottom of the page
And that’s it! After a few moments, your Joan 6 device will update with your new custom button.
There are numerous possibilities for this feature, but here are a few ideas we believe might be interesting for you:
- Company website link
- Connect to the office’s Wi-Fi network
In the “Message” field of the “Custom button” form, enter this text and insert your Wi-Fi’s SSID and password in the dedicated places:
WIFI:S:(insert_your_SSID);

T:WPA;

P:(insert_your_password);;
And click “Save”.
Once your guests will scan the code, they will be prompted to connect to the network.
An even more customizable option for the “Custom button” feature is a webhook. With it, the possibilities are limitless.
In order to set up the webhook as a custom button on your Joan device, you will have to follow these steps:
- Log in to MyJoan with your account credentials
- Navigate to the “Settings” page via the top navigation menu
- Select “Rooms” from the left-hand side menu and the "Device Settings"
- Scroll down and enable the “Custom button” feature
- Select “Webhook” as the “Action type”
- Select one of the three buttons you wish to replace in the “Replaces button” drop-down menu
- Enter the text you wish to be displayed as the button’s title in the “Button label” field. Keep in mind that the maximum number of characters allowed is 10
- Enter the URL of your webhook in the “Message” field
- Select the “Authentication” of your webhook as “Basic” if there is one, otherwise select “None"
- If you have selected “Basic”, enter the “Username” and “Password” for it
- Once satisfied with the input, click “Save” at the bottom of the page
And that’s it! After a few moments, your device will update with your new custom button.
As an example, we will set up the custom button to ask for IT help, by sending a message on Slack. Please follow the steps below:
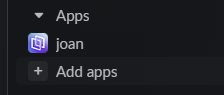
- Open your Slack workspace, and on the left-hand side, you will see the "Apps" category. Please click on "+Add apps"
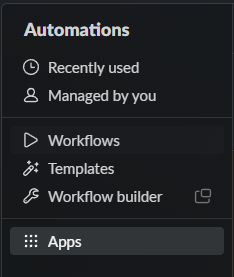
- Once opened, you will need to go to "Workflows"
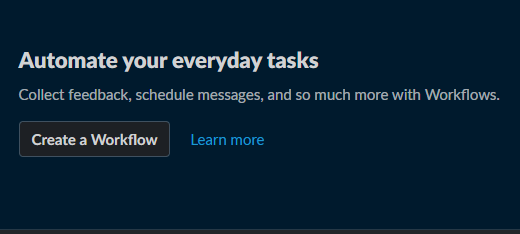
- We will need to create a new Workflow
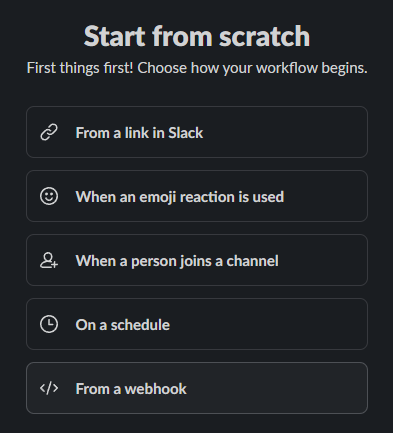
- Choose the Webhook option, which is the last one on the list
- Now, we need to set up the variables (the information that will be pulled from the device)
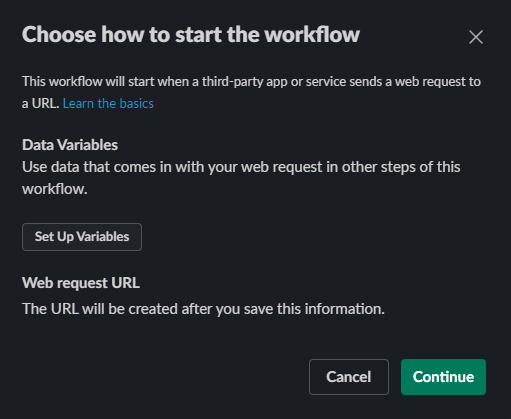
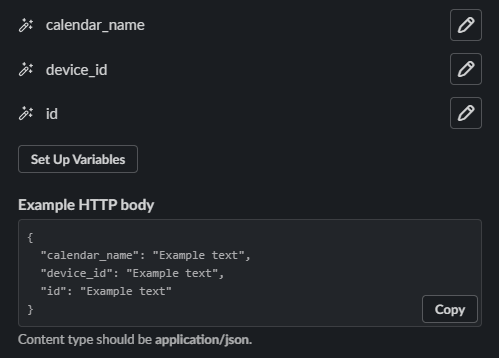
- You can use the variables shown below. Each variable should be in text format. "calendar_name" will pull the room name, "device_id" will pull the UUID of your device, and "id" will show you the ID of the button.
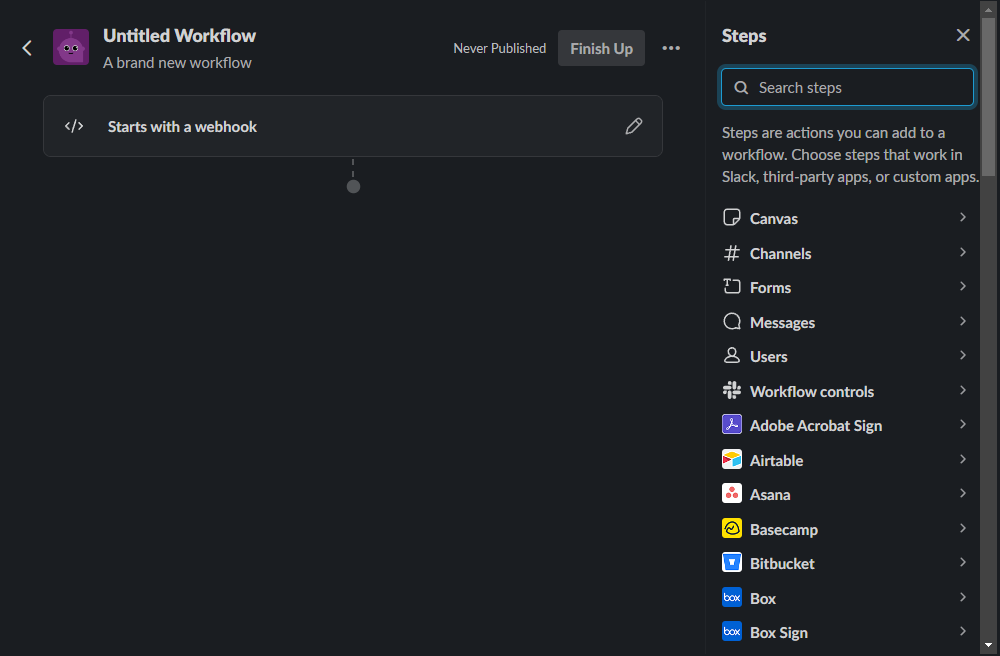
- Hit "Save", and now you want to create a new step. On the right-hand menu, choose "Messages" and then "Send a message to a channel"
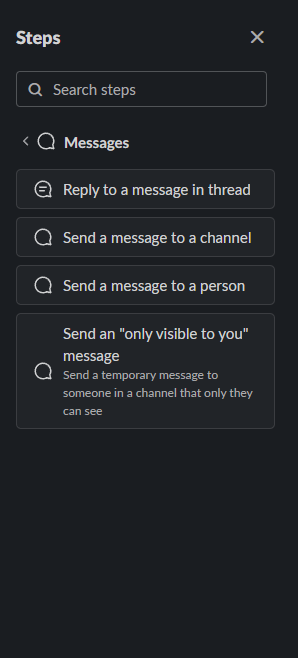
- You can choose which channel the alert will go to, and you can also customize the message to include your variables, like shown below.
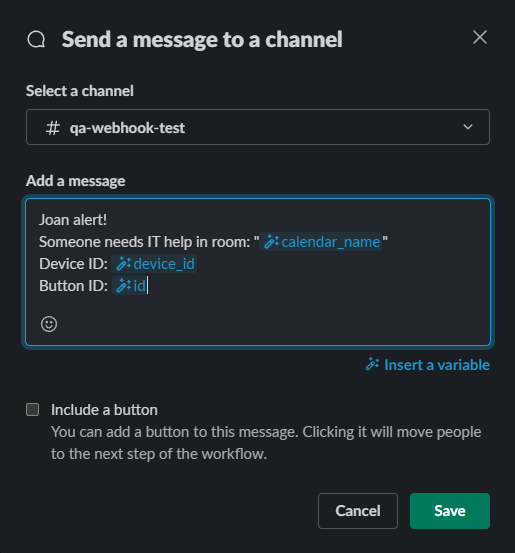
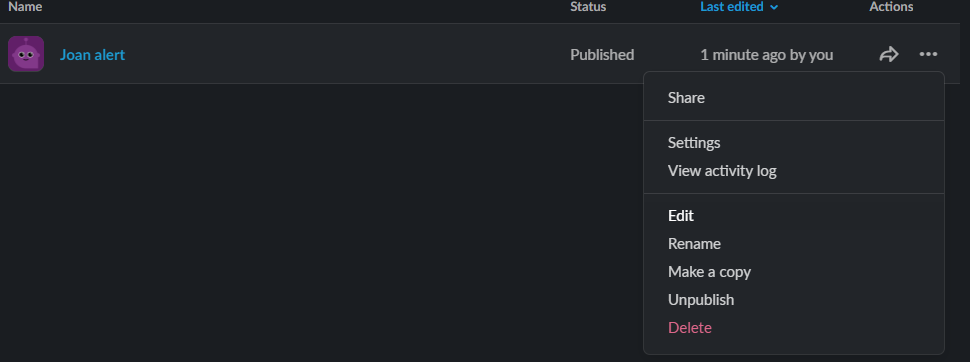
- Hit "Save" and publish your new Webhook Workflow. Once it is saved, you will want to edit it again one more time. Like shown below.
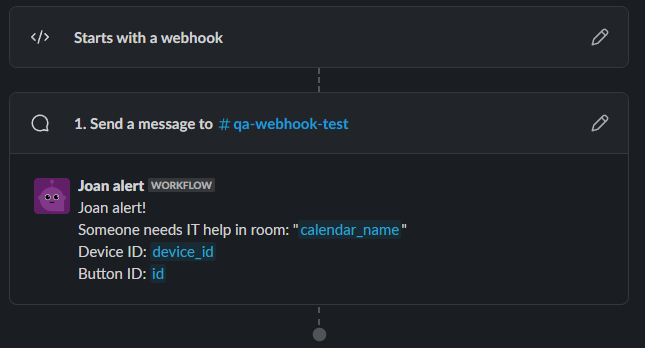
- The first step, "Starts with a webhook", click on the edit button for that
- When editing the webhook step, you will be able to see the Web request URL. Please copy that.
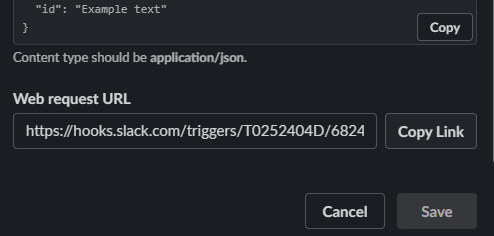
- Create a custom button in MyJoan, like it was explained in the previous section, and paste the URL we copied on step 13 into the "Webhook URL", like shown below.
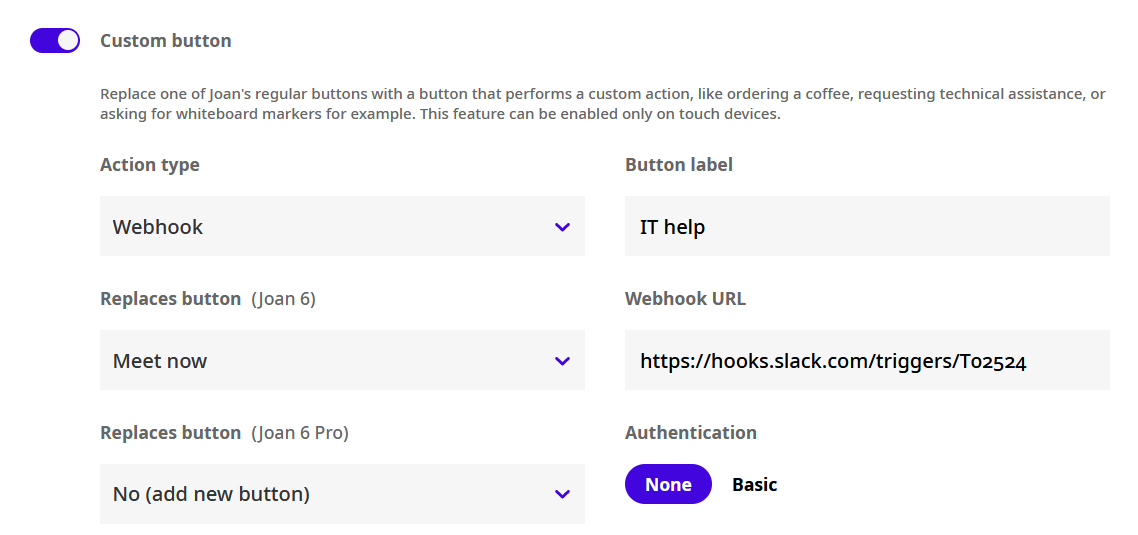
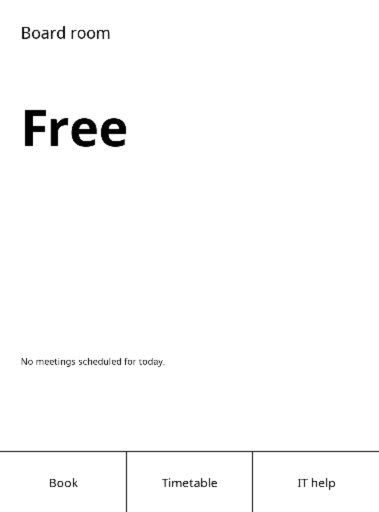
- As shown in the previous picture, the button will be called "IT help" in this example, shown on the device as the picture below.
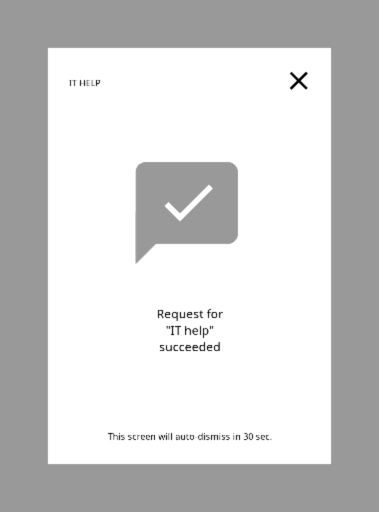
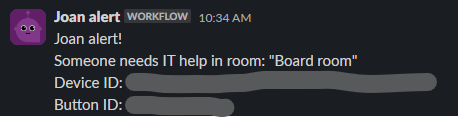
- That's it! Once you click on the button, you will be presented with a message on the Joan device confirming the command went through, and, a message will be sent on Slack.
Other ideas for a webhook
As stated previously, with webhooks, the possibilities are limitless. But, we do have a few ideas that might be interesting to you:
- Send an SMS to a specific person
- Request help from your IT department
- Request a drink for you and your guest
We recommend checking out IFTTT (https://ifttt.com/) and Zapier as these solutions will allow you to fully utilize the webhook feature and create amazing integrations with Joan and your apps and devices.
*If you encounter any issues, please contact support@getjoan.com.