The Departments functionality for the MyJoan desk booking application provides an opportunity to set desk reservation rules for your teams and for individuals.
This feature can help you to organize your office desks into Departments therefore only the team members who are assigned to the same department are able to reserve them.
To enable it, go to Settings > Policies, select Enable departmental booking rules and click Save.
Or you can permanently assign a desk to a specific employee, therefore, nobody else will be able to reserve that but you will still know when is he/she planning to come to the office.
How to create departments and assign members to them
How to add an employee to department
How to add new desks and assign them to the department
How to modify multiple desks at the same time
How to filter desks by department
How to reserve multiple desks for the same period
- Go to the Desk Booking Application website and log in with your administrator or office manager account.
- Click Settings at the top.
- Click Departments on the left.
- In the drop-down menu, select the building where the department should be created. To let colleagues book desks freely across multiple offices, select All Buildings.
- Click Add Department.
- In the New Department window, enter a name for the department (e.g. Operations) and click Save.
- Under Assigned Employees on the same screen, add members from the user list.
- Optionally, use Limit occupancy per department to set the percentage of bookable desks, so colleagues can keep a safe distance in the office.
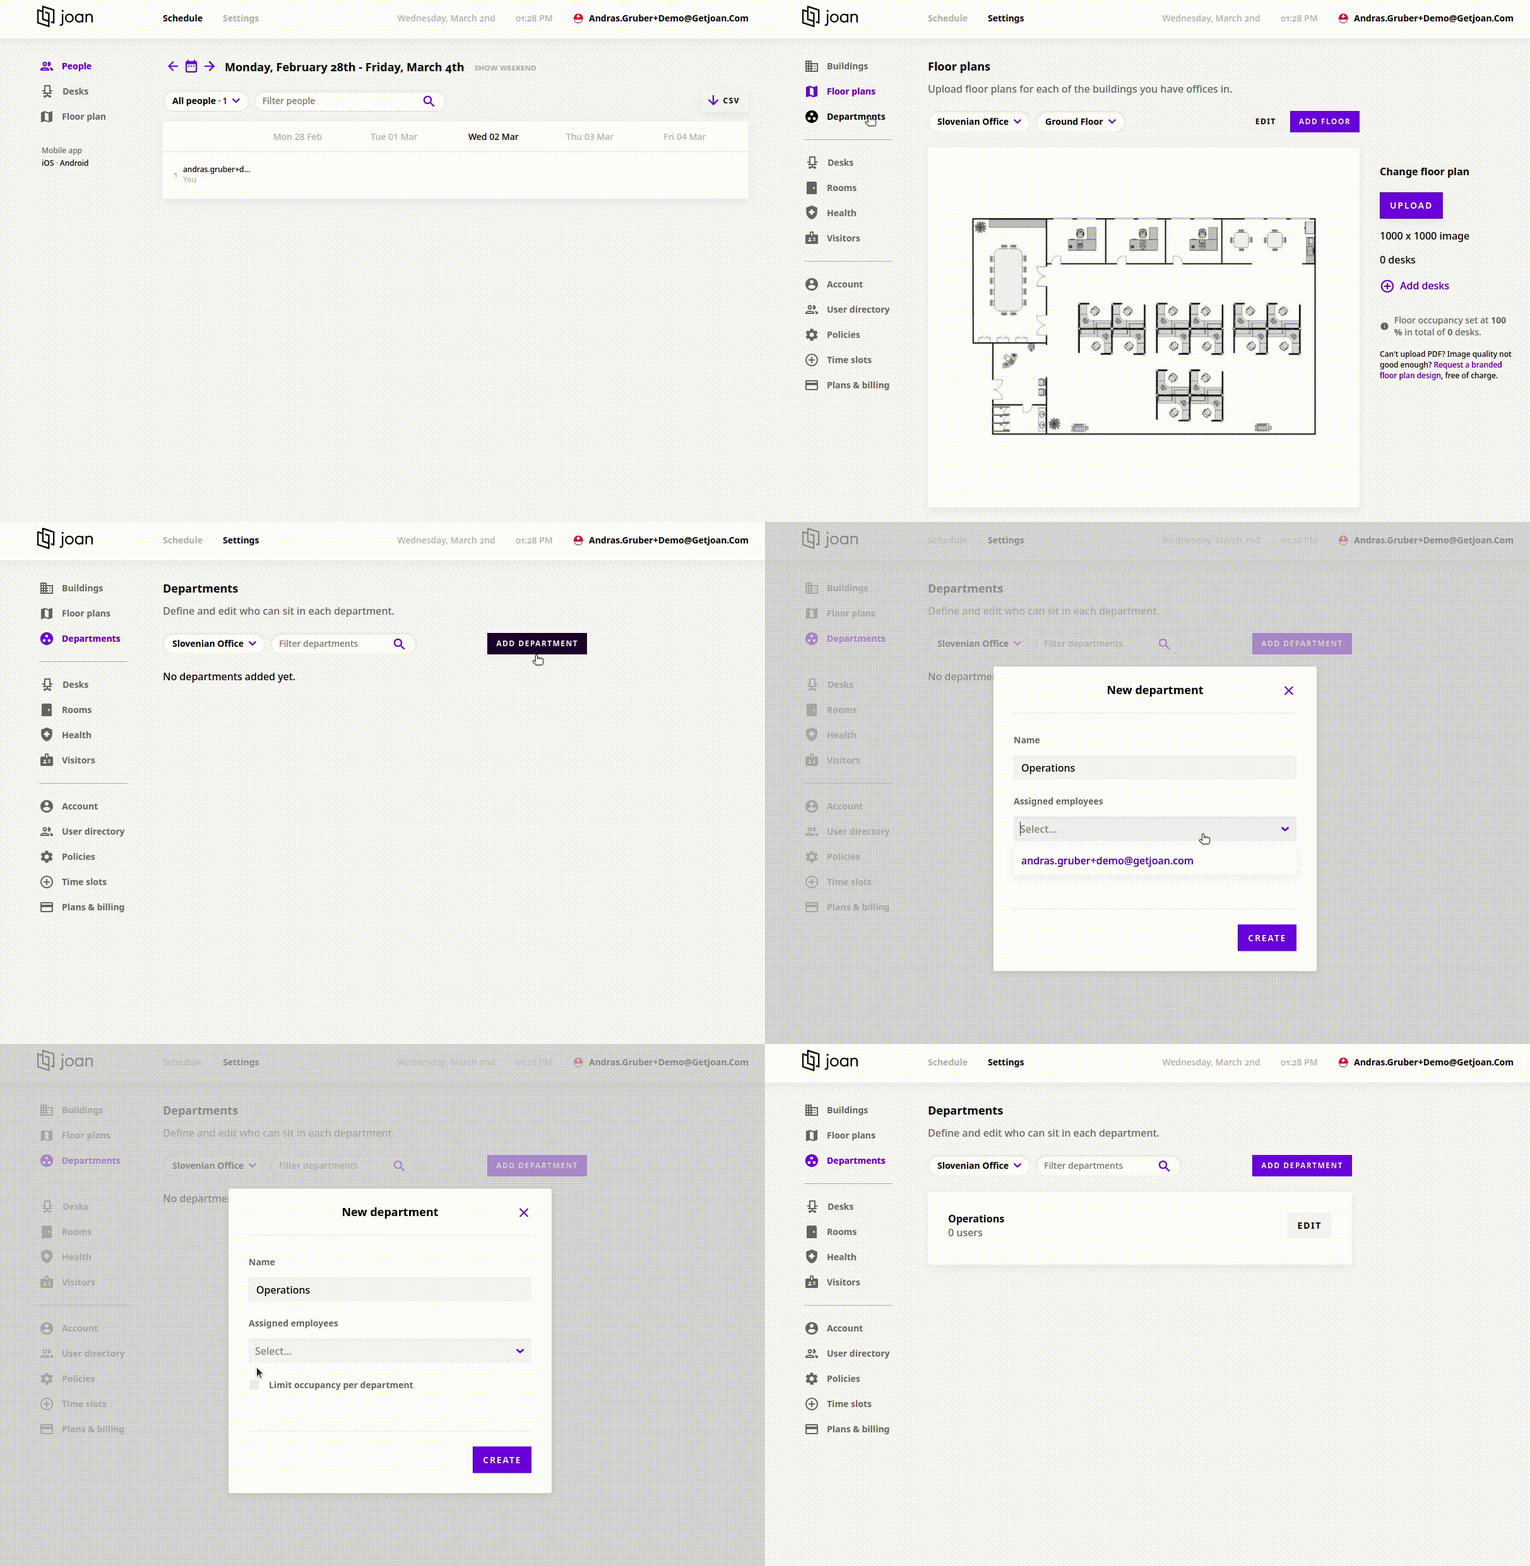
The new department now shows in the Departments list for the building you selected.
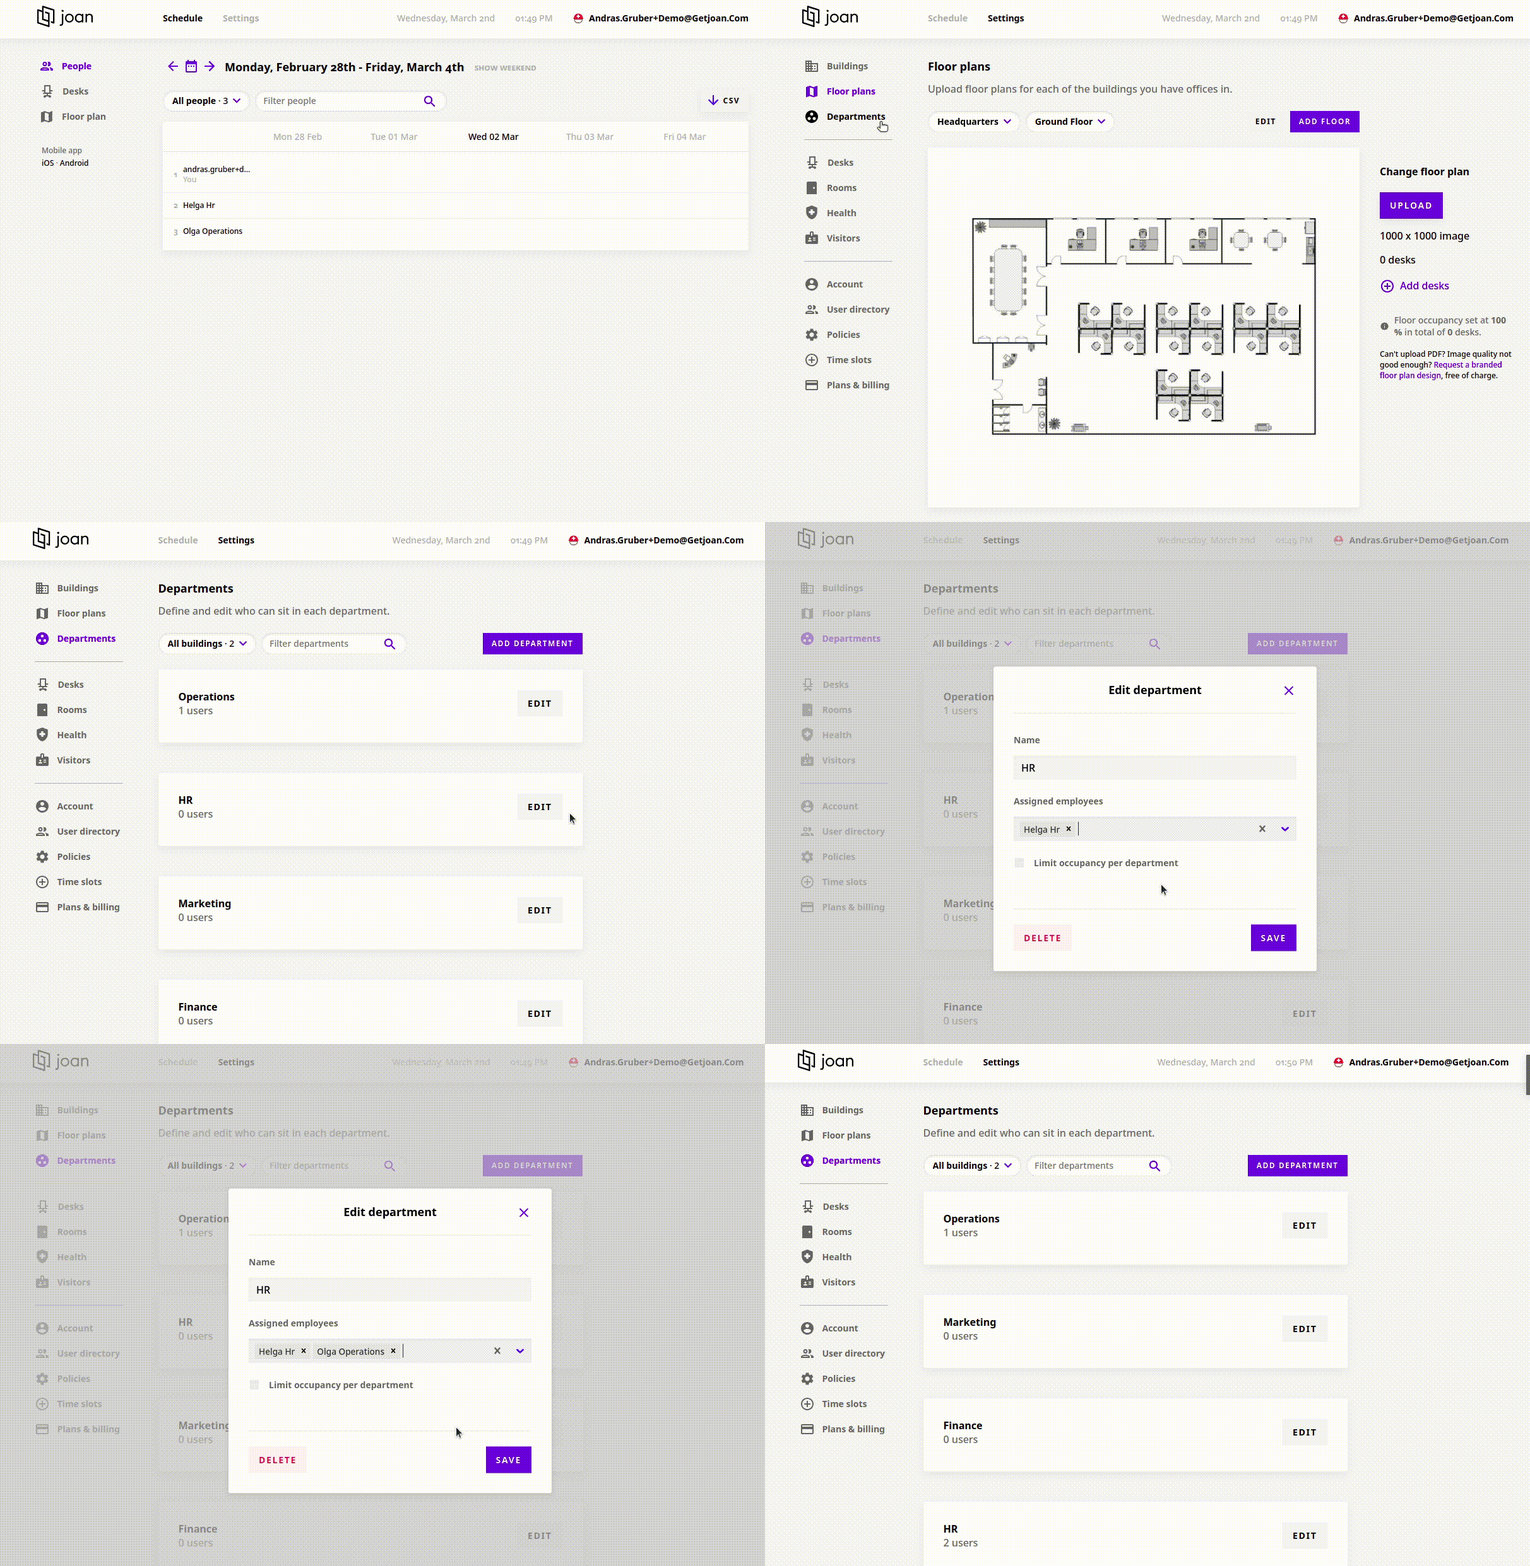
To change a department's name, members or occupancy rate:
- Go to Settings > Departments.
- Filter by building, or use the search field to find the department.
- Click Edit.
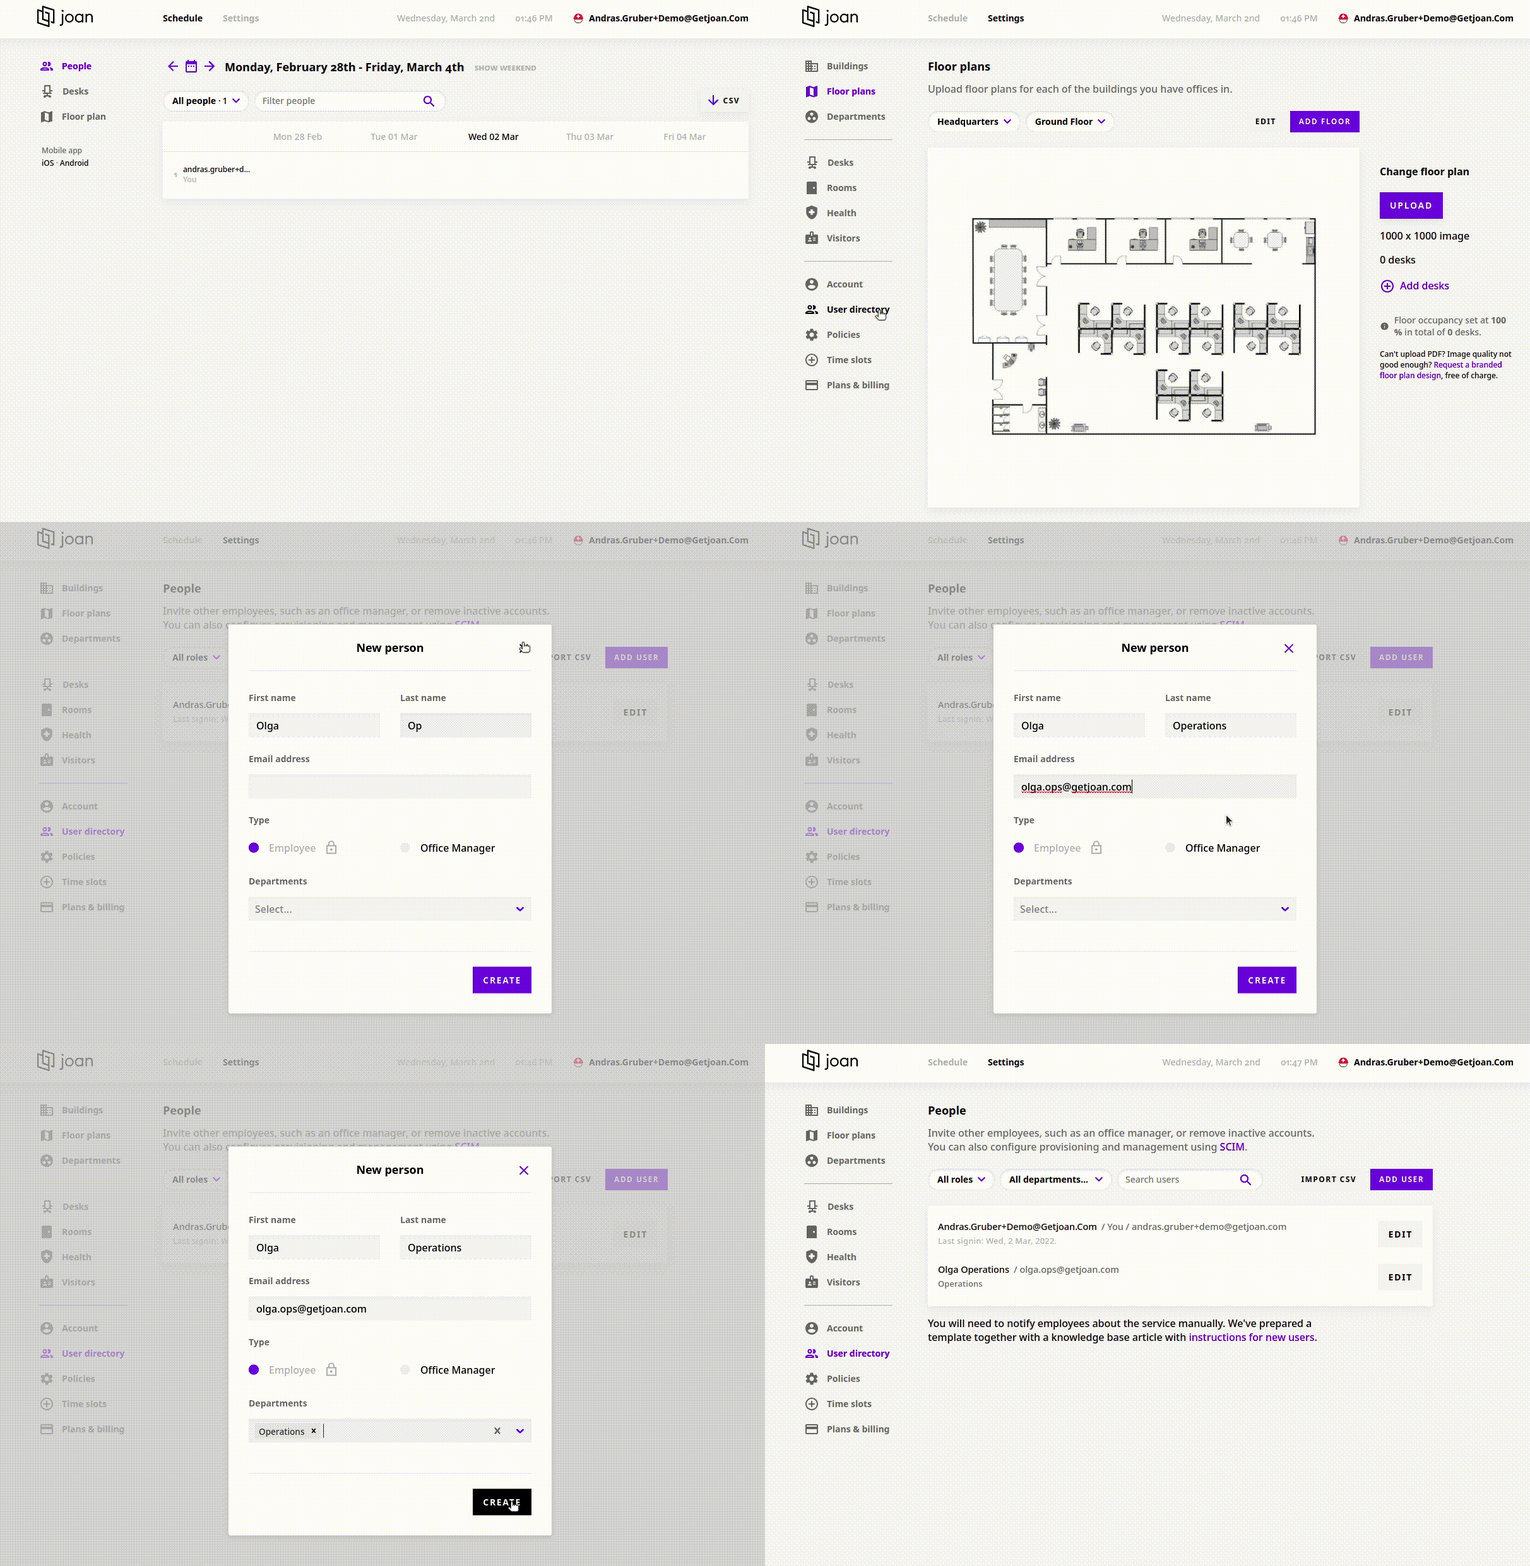
Employees can be assigned to one or more Departments during the user account creation process or after that by opening the User directory menu on the Settings page.
These department memberships are going to define which desks an employee can reserve.
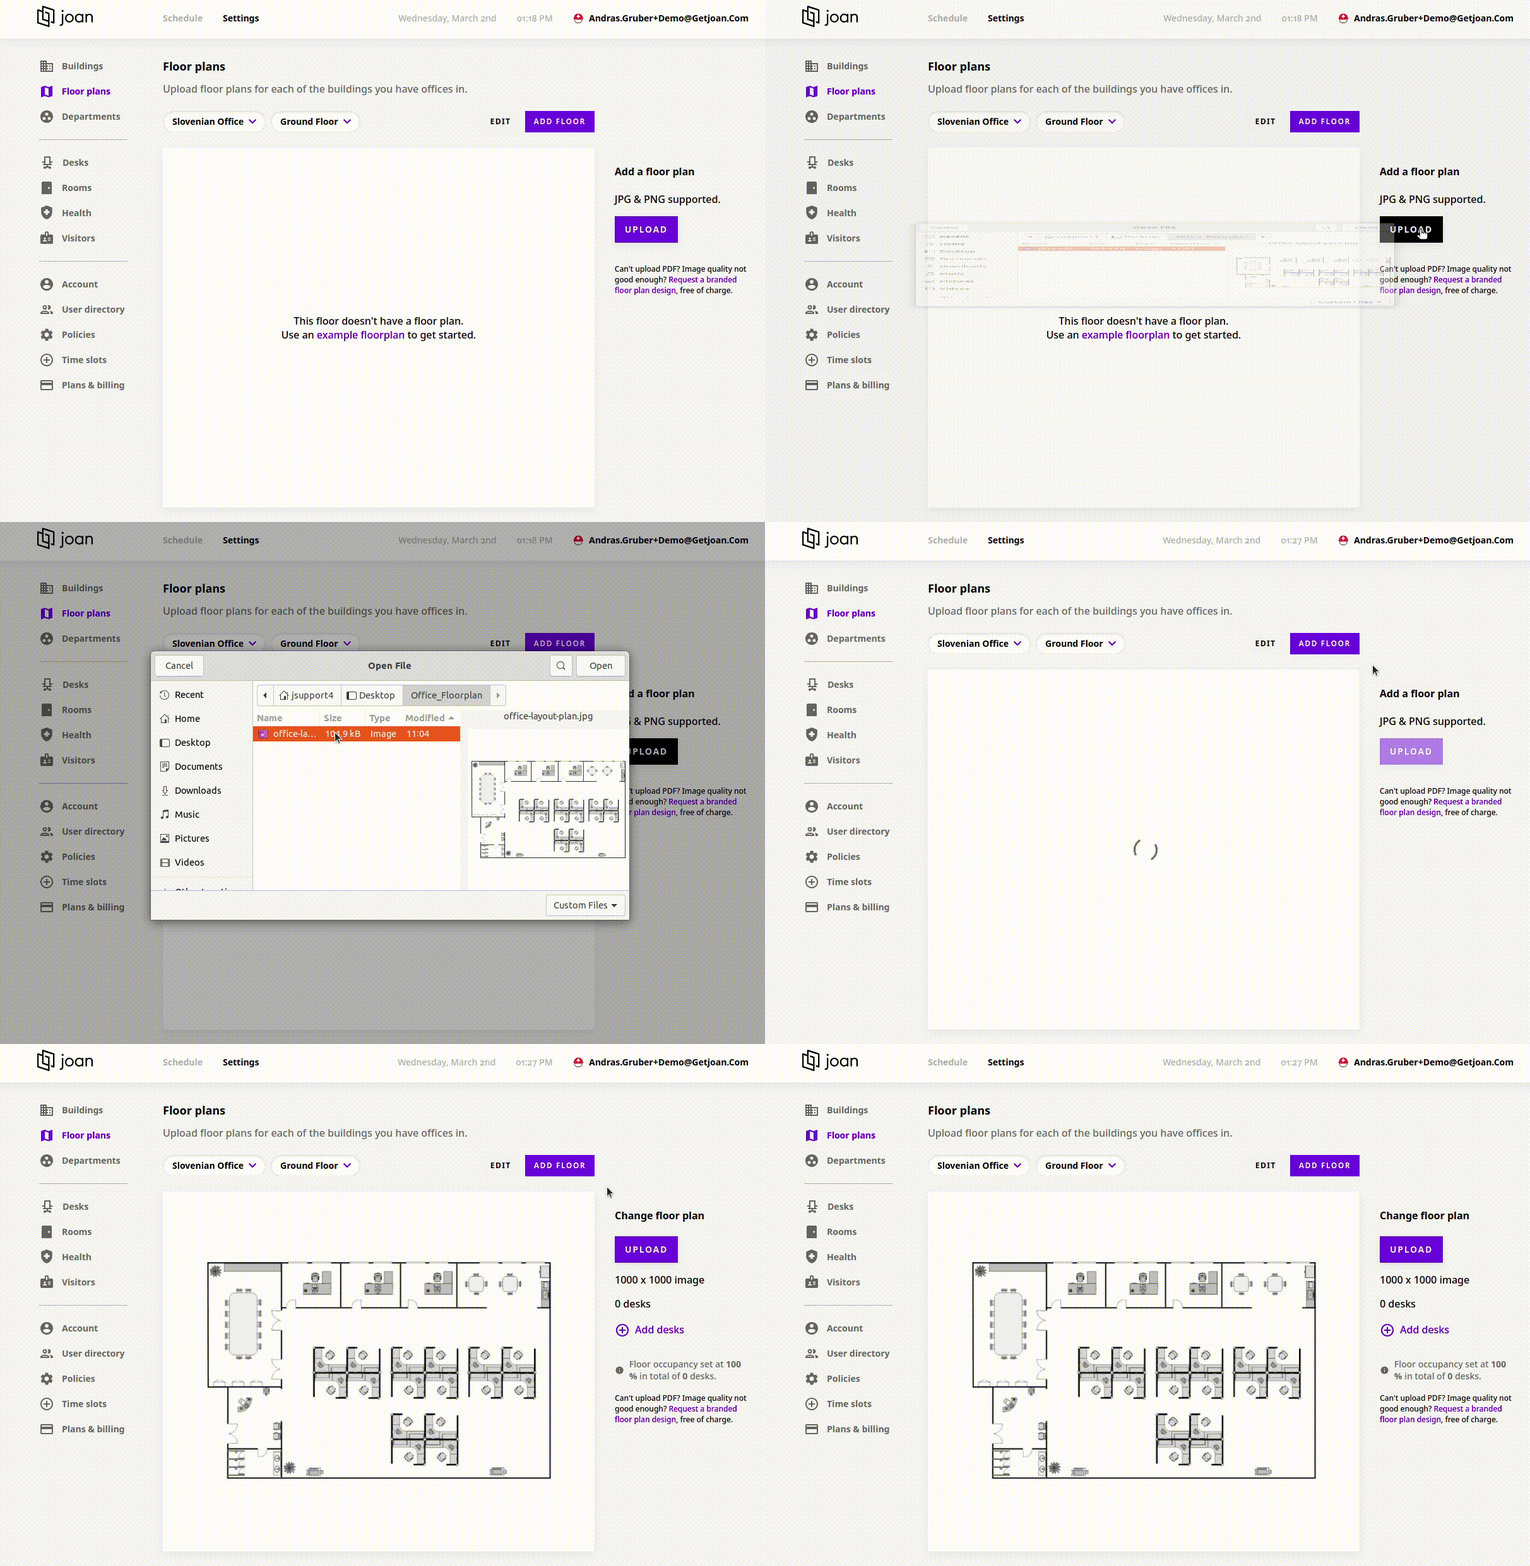
You are able to upload your office floor plan in .JPG or .PNG format. If you have them in .PDF format you can use an online tool to convert them. The floors are used by your team members when booking the desks, so please crop the images into logical sections before uploading (you can use an online tool to do this).
If you wish to replace your current floor plan with a newer image, you can easily do that by clicking on the upload button under the Floor plan menu in the Settings section.
If you upload the new floor plan image in the same size as the current one, your existing desks will not be needed to be realigned.
Now, when we have set the Employees and the Departments, let's take a look at the Desk assignments.
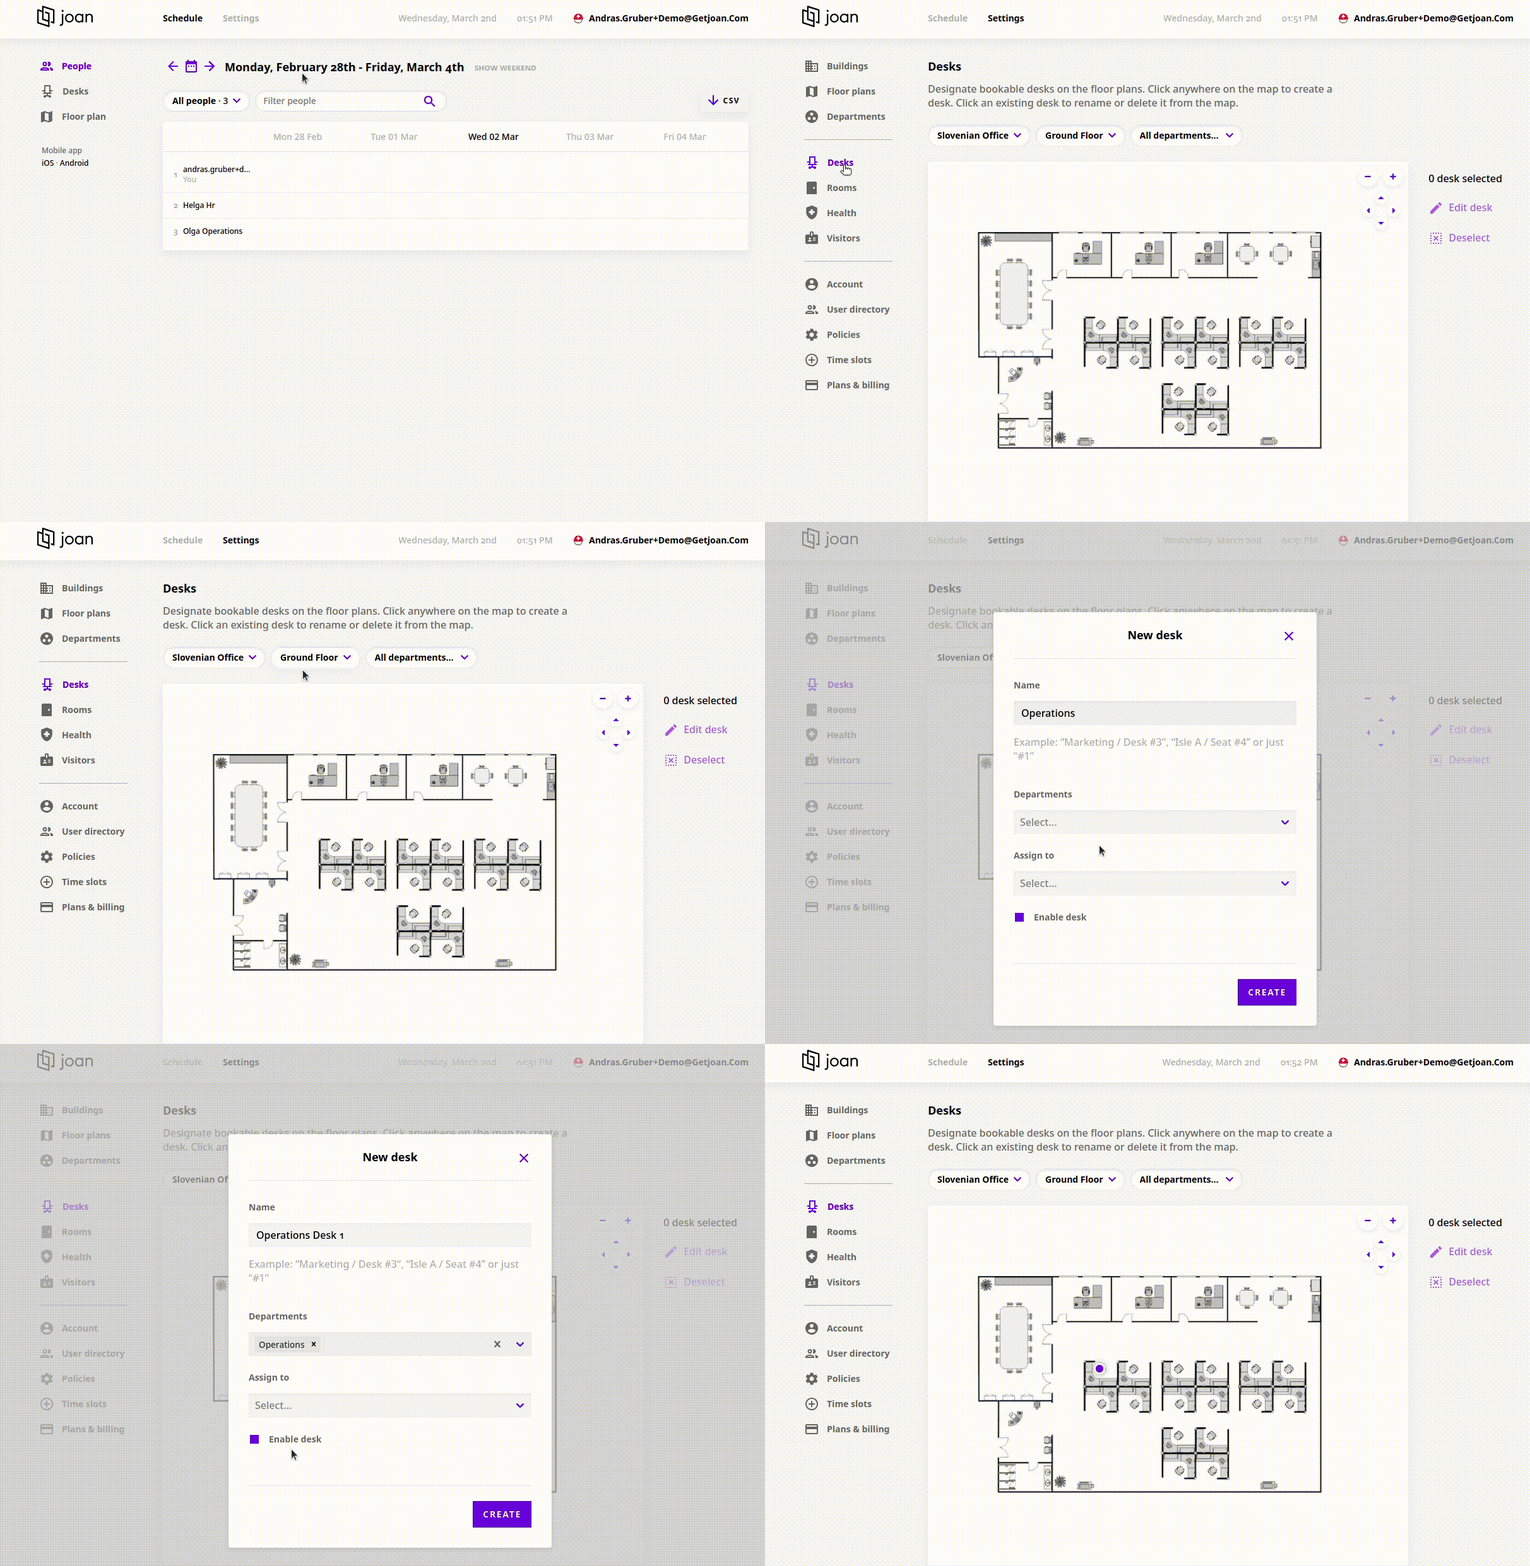
- Go to Settings and click Desks in the left pane.
- Select the building, then the floor, to load the floor plan.
- Click the spot on the floor plan where you want the new desk.
- In the New desk window, name the desk (e.g. "HR desk 1") and select the department or departments it belongs to.
*Note Because the general settings are shared globally, toggling Enable departmental booking rules activates the feature for both desks and assets simultaneously. To apply these rules to your resources, simply go to your Asset list under the Parking & Assets menu, edit an asset, and select the permitted team from the Department dropdown.
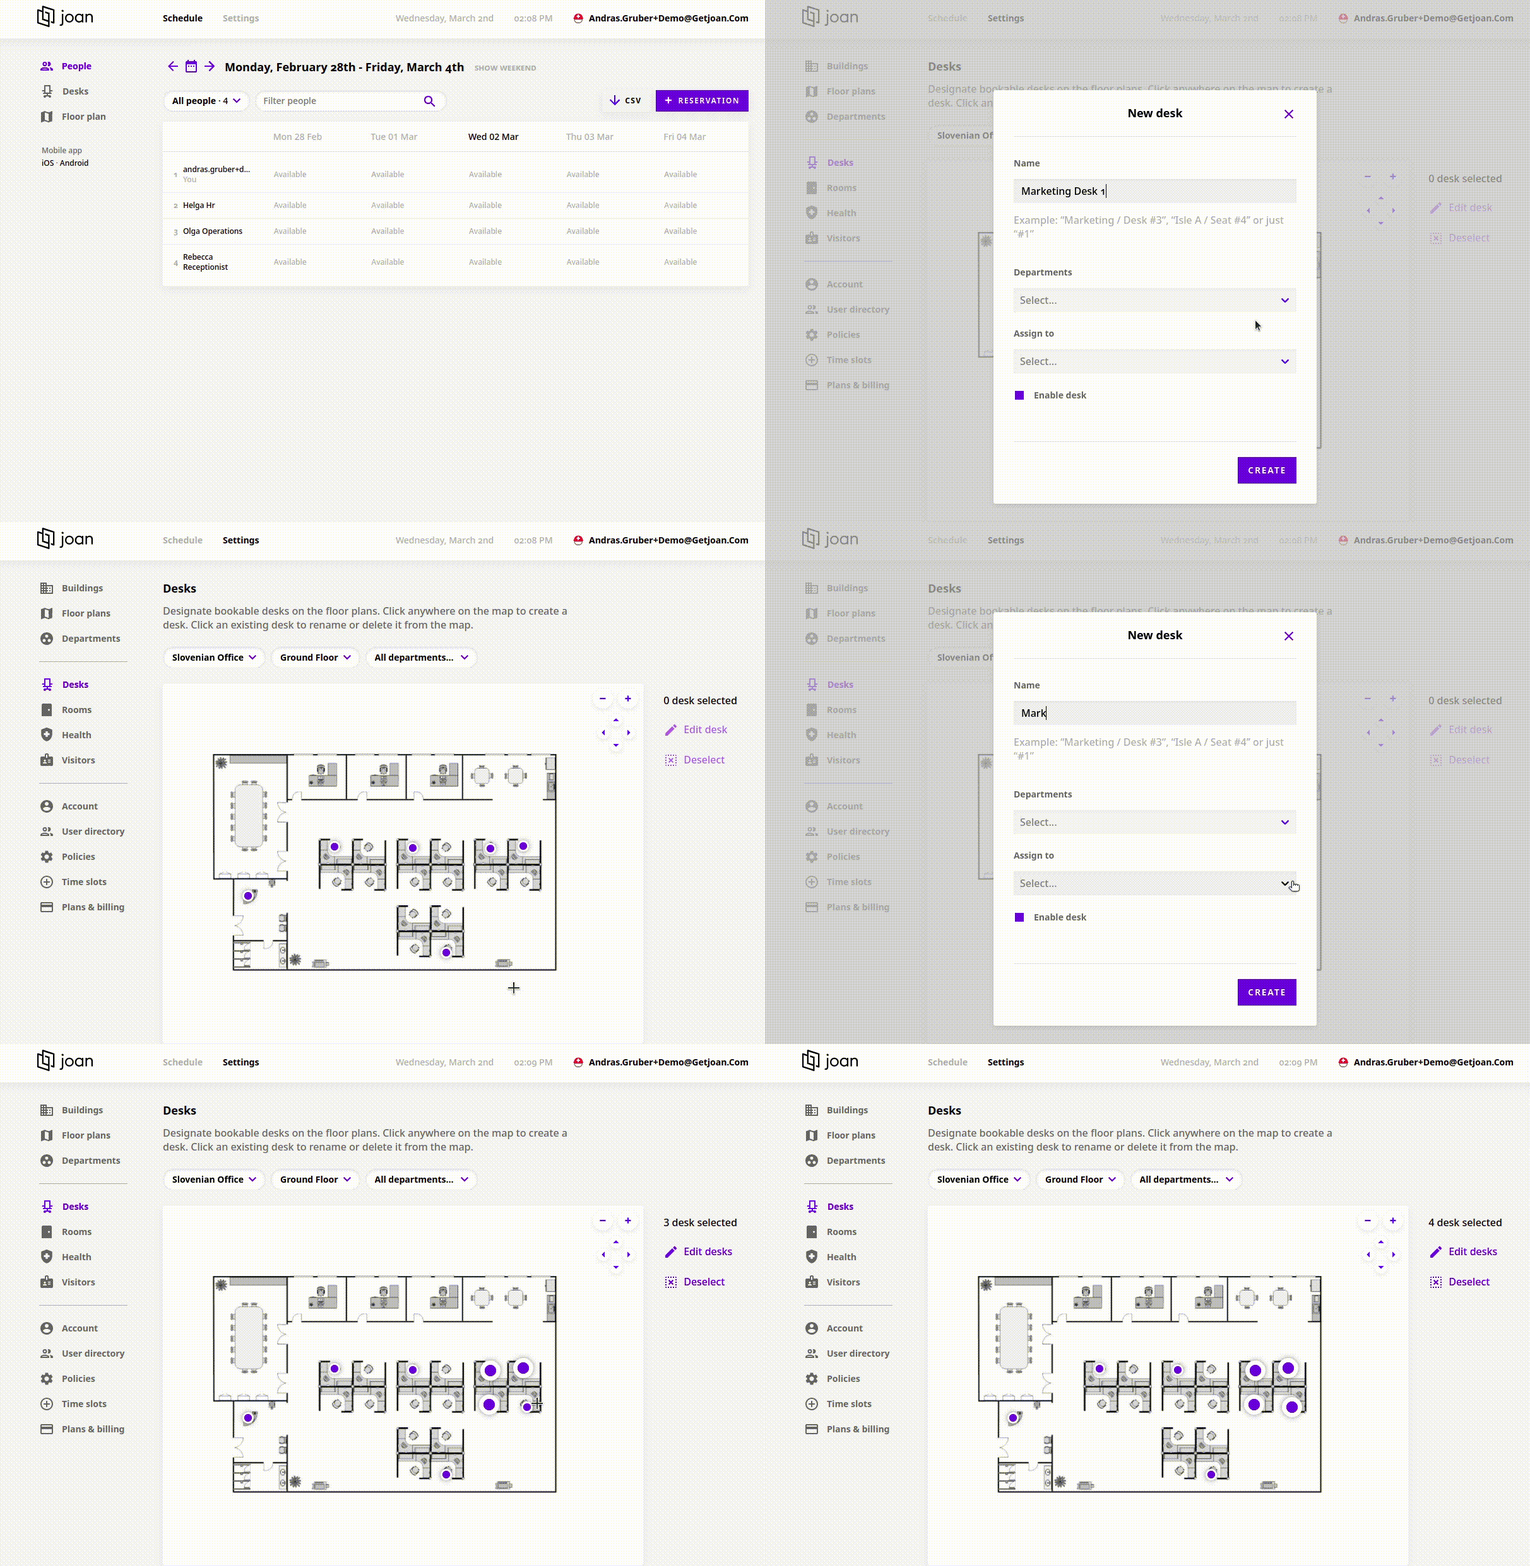
To assign more than one desk to a department at once:
- Go to Settings > Desks.
- Select the desks you want to edit.
- Click Edit desks in the right pane.
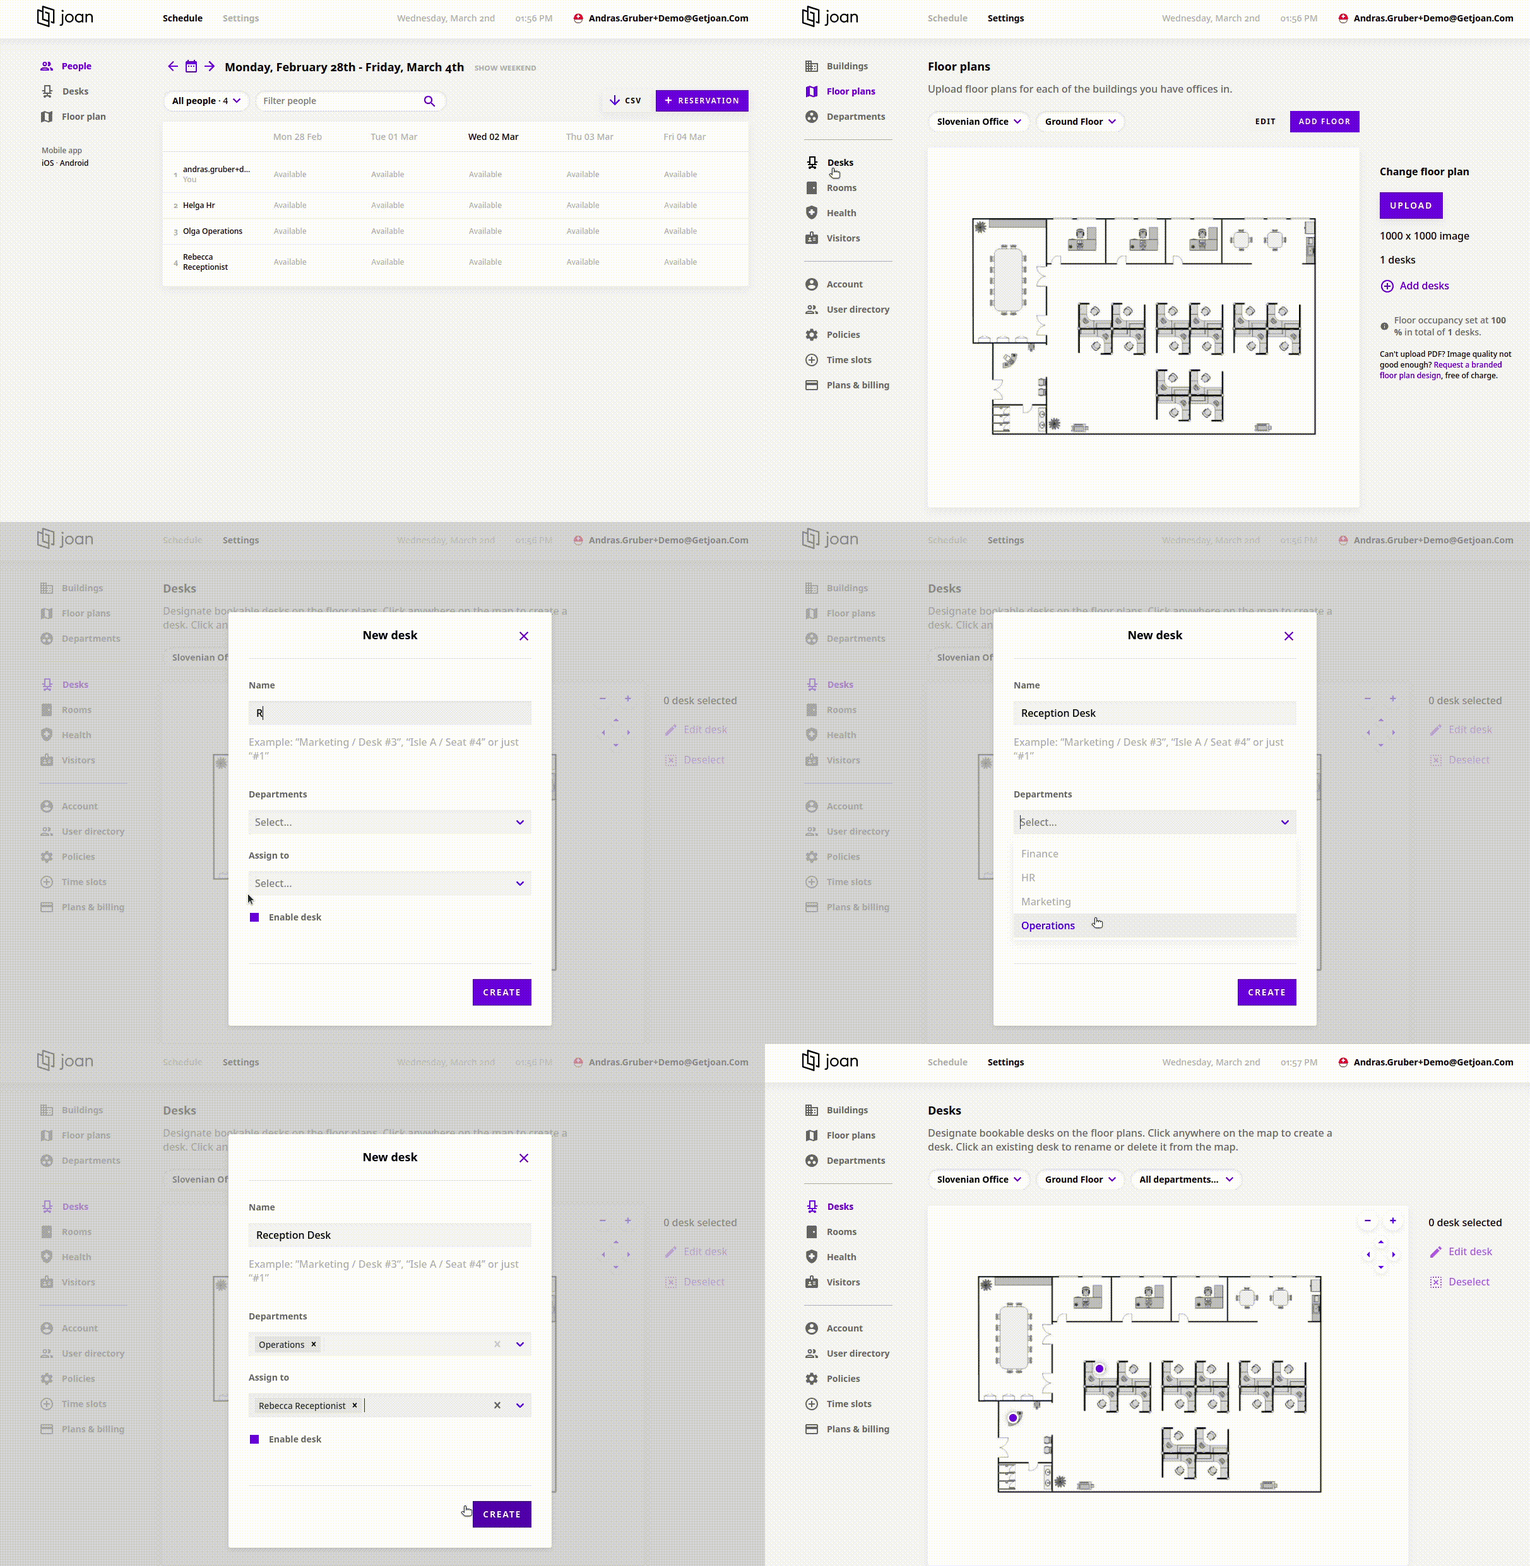
If you have special desks in your office that are assigned to a specific person or role for example the reception desk or the general manager's, you are able to prevent others from reserving them.
To limit who can book these desks, simply specify the desk only to those who are allowed to book them.
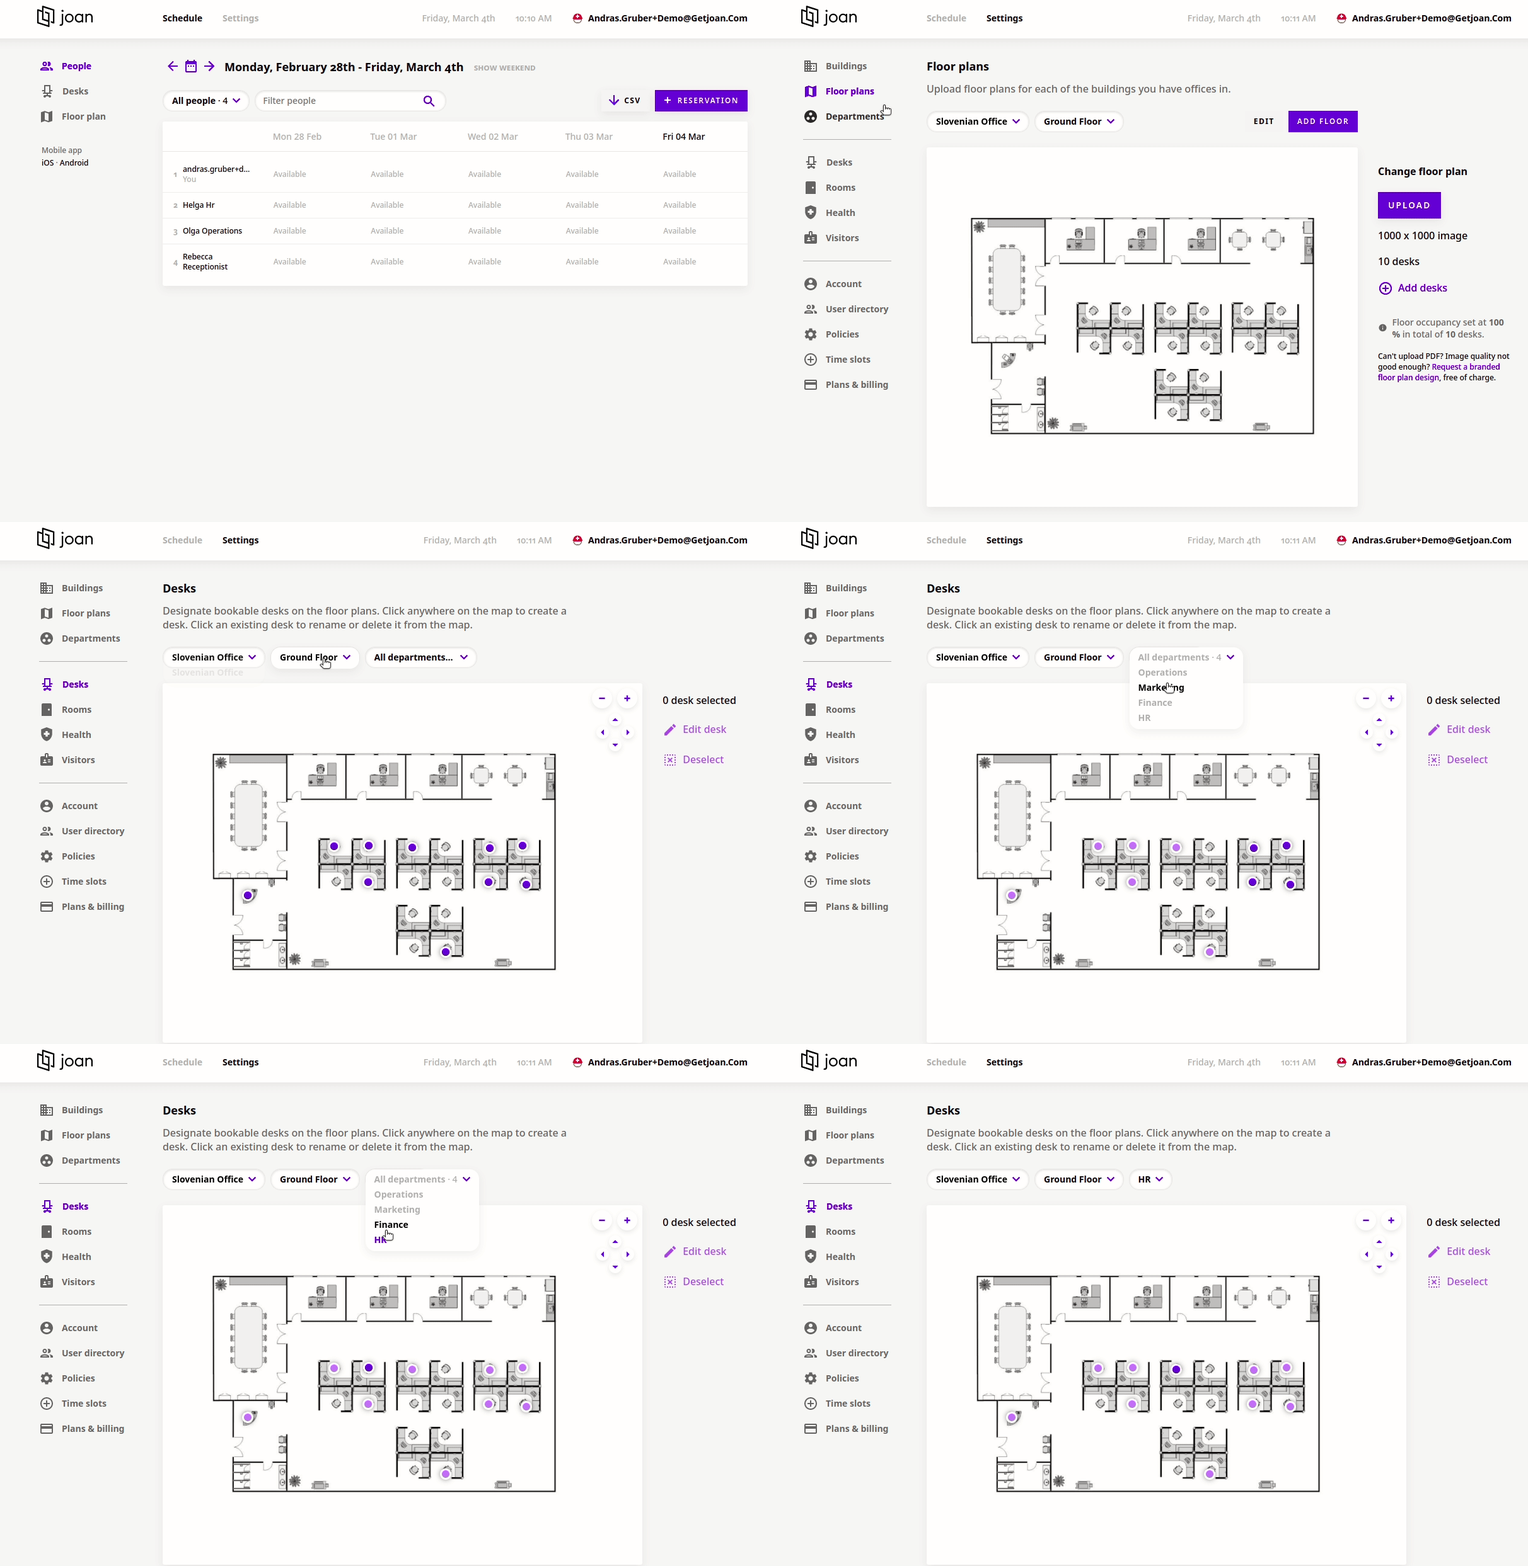
Once you have everything set, you might want to see which desks belong to which department.
By using the drop-down menu under Settings -> Desks, you can easily highlight the desks belonging to the same department.
In some cases, it might be useful to let your colleagues create multiple reservations for the same time frame so they can reserve a desk for their guests, or ensure there is a parking spot waiting for them when they arrive in the office.
Office managers and administrators can turn this on:
- Go to Settings and click Policies on the left.
- Untick the Limit 1 concurrent desk reservation per person policy.
- Click Save.
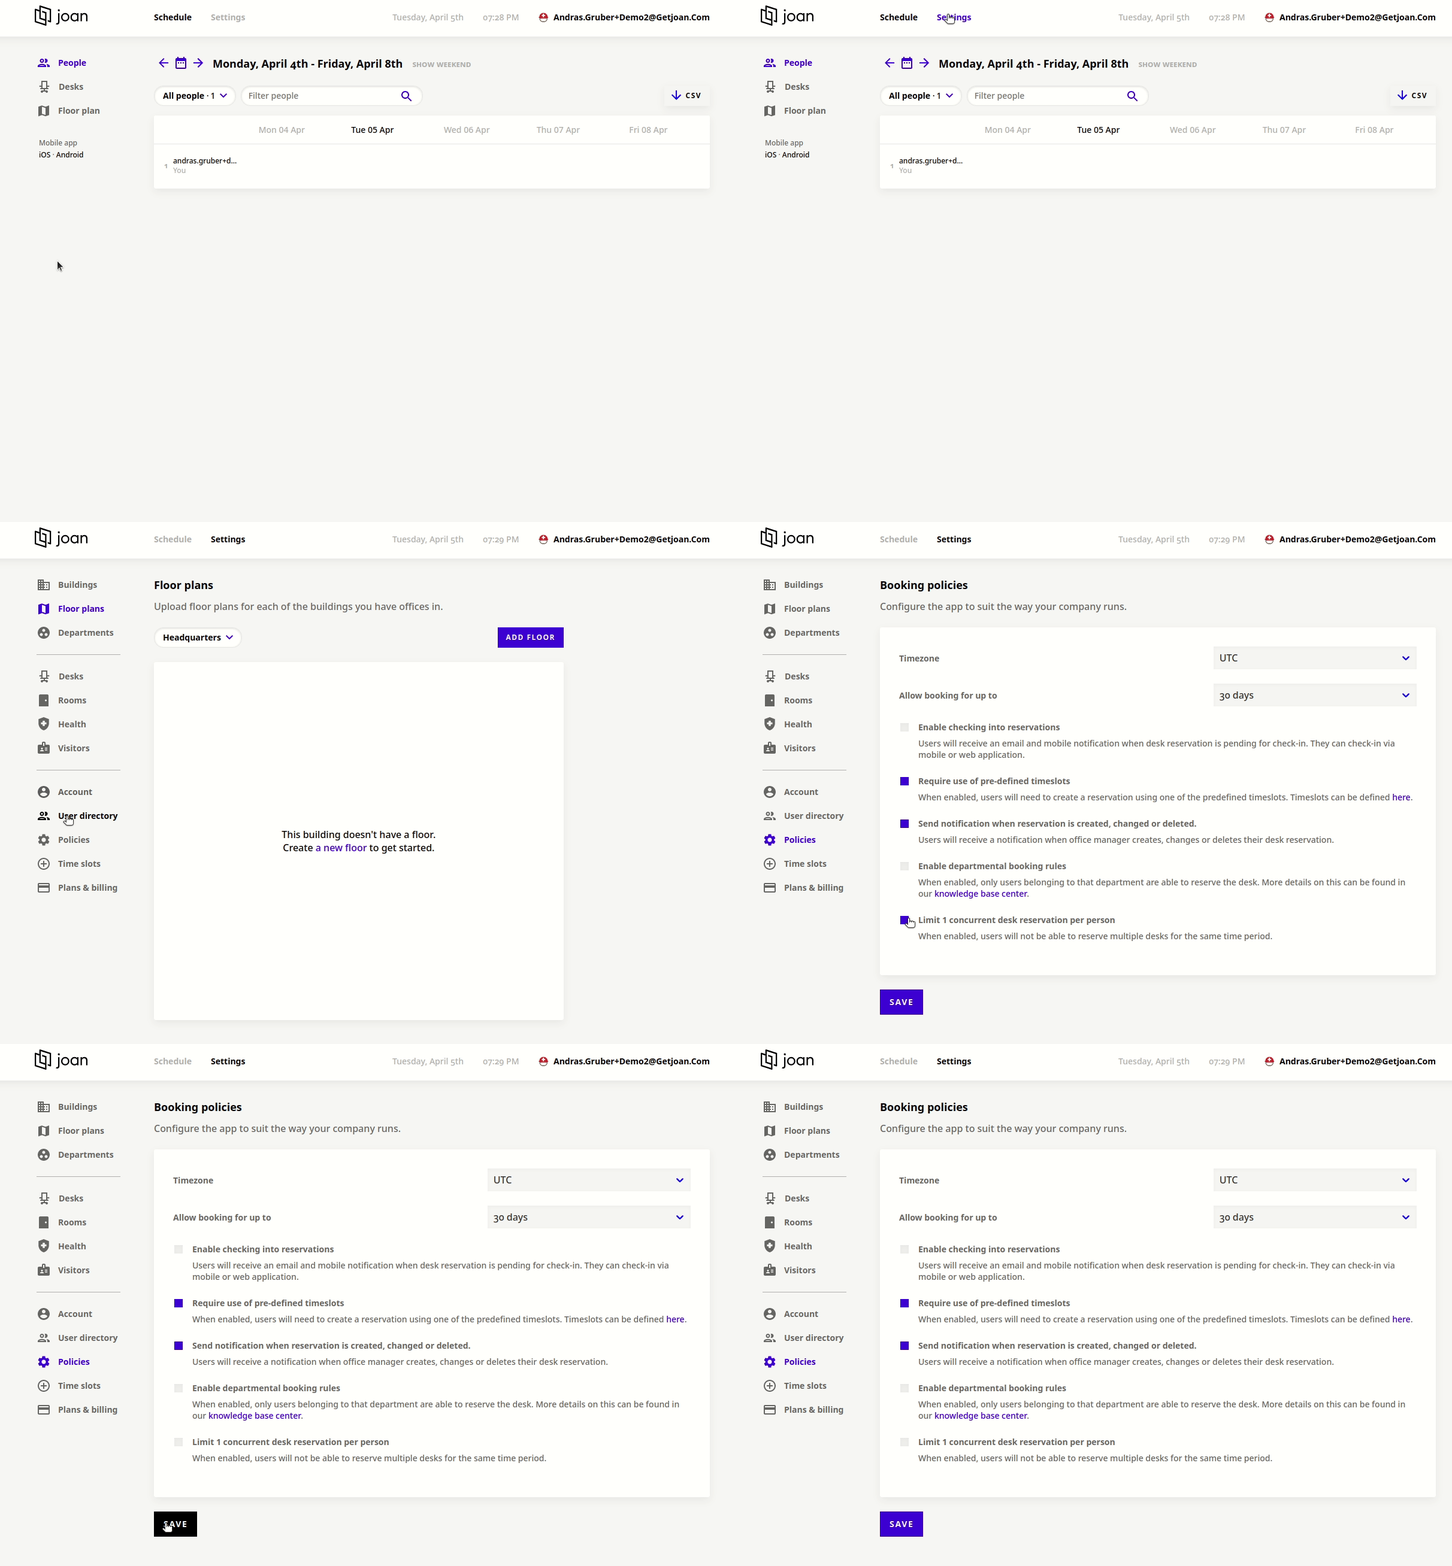
Your colleagues can now make more than one reservation for the same time period.
Please feel free to contact us via our chat platform or send your questions to the support@getjoan.com email address.